In modern poultry farming, chicken product play a vital role in increasing efficiency, reducing labor, and boosting output. With the continued development of the poultry industry, the variety of chicken cages has expanded. Common types include brooding cages, laying hen cages, and breeding cages. Among them, single-tier cages and multi-tier cages are the most common. This article will provide detailed installation steps and tips for these cages, helping you improve farming efficiency and management.
Product of Chicken Cages and Installation Requirements
Chicken cages come in different types, each designed for specific farming needs. The most common types include:
Brooding Cages: These are used for raising young chicks, ensuring healthy growth. These cages are typically small, ideal for the early stages.
Laying Hen Cages: These cages are designed for adult laying hens. They are made to facilitate egg production and efficient management.
Breeding Cages: These are specially designed for breeding hens, ensuring high-quality eggs for breeding.
When choosing the right cage, it is crucial to understand the functions and structure of each type. Different cages have different installation requirements, and in this article, we will focus on the installation of single-tier and multi-tier cages.
Installation Steps for Single-Tier Chicken Cages Product
Single-tier cages are relatively simple to install. They usually consist of a bottom net, top net, and a middle separator. Below are the detailed installation steps:
1.Preparation
Before installing the single-tier cage, gather the necessary tools and materials:
Tools: Screwdriver, wrench, electric drill, pliers
Materials: Bottom net, top net, separator, frame, screws, and nuts
Make sure all the cage parts are ready and organized in the installation area. This will save you time during the actual setup.
2.Install the Bottom and Top Nets
First, place the bottom net and top net in their respective positions. The bottom net forms the base, providing stability, while the top net supports the entire structure.
Secure the bottom net and top net onto the frame. Ensure that there are no large gaps between the meshes.
Use screws and nuts to fasten the bottom and top nets tightly. This step is essential to ensure the structure is stable and there are no loose parts.
3.Install the Middle Separator
Next, install the separator. The separator divides the cage into individual sections, giving each chicken enough space.
Attach the separator between the bottom and top nets. Make sure to adjust the height of the separator according to the size of the chickens.
Secure the separator using pliers or other tools to ensure it is firmly fixed. Depending on the design, you can adjust the number and height of the separators as needed.
4.Check the Overall Structure
Once the bottom net, top net, and separator are installed, it is time to check the entire structure for stability. Ensure there are no loose parts, and the mesh is firmly secured. If any screws or connections are loose, tighten them immediately.
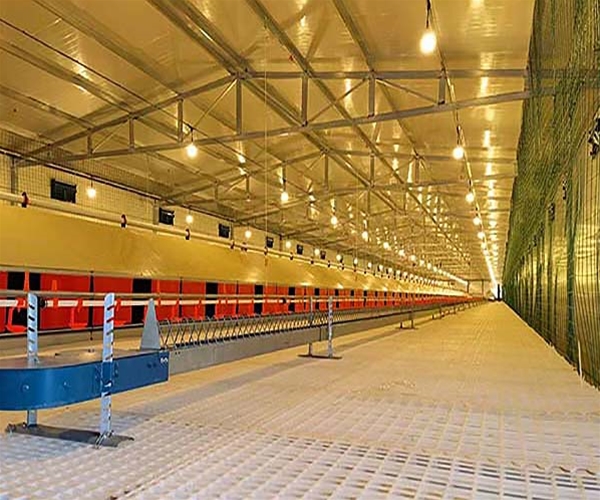
Installation Steps for Multi-Tier Chicken Cages Product
Multi-tier chicken cages are made by stacking several single-tier cages. This setup allows more chickens to be raised in a limited space, making it ideal for large-scale farming. Below are the detailed installation steps:
- Preparation
As with single-tier cages, you will need the necessary tools and materials. However, multi-tier cages require vertical supports to ensure the stability of each tier.
- Install the Bottom Tier
Start by installing the bottom-tier cage according to the steps for single-tier cages. The bottom-tier cage forms the foundation of the entire setup, so make sure to install it carefully.
Make sure the bottom-tier cage is placed flat on the frame, ensuring it is level and stable.
- Install the Upper Tiers
Next, install the upper-tier cages. When installing, ensure there is enough space between tiers for the chickens to move freely, while still keeping the structure stable.
Use additional fixing devices like screws or hooks to securely attach each tier.
After installing each tier, check the structure for stability. Make sure each tier is securely connected.
- Final Inspection
Once all tiers are installed, perform a final inspection. Ensure that each tier is securely attached and that the doors open smoothly. Also, check for any movement or instability in the structure. If everything seems stable, you are good to go.
Key Considerations When Installing Chicken Cages
Choosing the Right Location
When installing chicken cages, it is important to select a location with good ventilation, adequate sunlight, and a dry environment. Avoid placing cages in damp or poorly ventilated areas, as this could negatively impact the chickens’ health.
Ensuring Cage Stability
Especially for multi-tier cages, the weight of each tier must be evenly distributed. This ensures that the structure remains stable and prevents potential accidents. Always use high-quality supports and fixing devices during installation.
Regular Maintenance and Cleaning
After installation, regularly check and clean the cages. A clean environment helps prevent diseases and ensures healthy chickens. This is an important step in maintaining a productive farm.
Safety
Ensure that there are no sharp edges on the cage mesh to avoid injury to the chickens. Pay attention to every detail during installation to prevent any safety hazards that could harm the chickens.
Conclusion
Installing chicken cages is a crucial step in poultry farming. Whether you are installing single-tier cages or multi-tier cages, doing it correctly provides chickens with a safe and comfortable environment, improving farming efficiency and production. By following the steps and tips outlined in this article, you can easily set up your chicken cages and lay a solid foundation for your farm’s success.
If you encounter any issues during installation or need more information on choosing and installing chicken cages, feel free to contact us. We offer professional advice and customized services to help you succeed in poultry farming.